A. You have active Google App Engine Account.
B. You have already created an application for this project in your Google App Engine Account.
C. You have already downloaded the "jtwitter.jar" from
http://www.winterwell.com/software/jtwitter.php
First add the plug in of GAE in your Eclipse. For that follow the below steps:
A. Open the Eclipse (mine was Eclipse Ganymede).
B. Go to Help -> Software Updates...
C. After opening the "Software Updates and Add-ons" window click on the button "Add Site...".
D. Put the address as per your flavor of Eclipse.
a) Eclipse 3.3 (Europa): http://dl.google.com/eclipse/plugin/3.3
b) Eclipse, for Eclipse 3.4 (Ganymede): http://dl.google.com/eclipse/plugin/3.4
c) Eclipse, for Eclipse 3.5 (Galileo): http://dl.google.com/eclipse/plugin/3.5
E. After clicking "OK" you can see the "Google Plugin for Eclipse" is on the list of "Available Software". Check on the Checkbox and click on the "Install" button.
It will install the plug in in the Eclipse now follow the below steps:
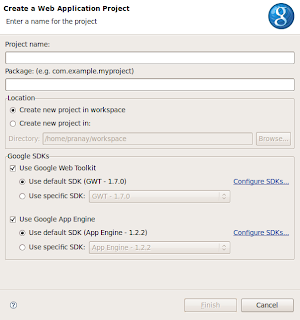
1. Open the Eclipse (mine was Eclipse Ganymede). Then go to File. Under the "File" click on the "New" then click on to the "Web Application Project".
This window will appear:
2. Fill up the form as per below screen-shot.
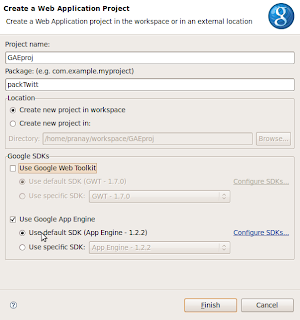
The Project Name is : "GAEproj" and Package is "packTwitt". We are not going to build this project with Google Web Toolkit, so please uncheck the "Use Google Web Toolkit". Also make sure your default SDK for this project is "App Engine". Now click on "Finish".
3. You can see the "GAEproj" is on your Package Explorer of Eclipse.
4. Right now we want to test this project at our local server.
5. Select the Project. Click on the "Build Project" under "Project Menu". It will build your project. Now go to "Run" Menu and choose "Run as", then select "Web Application".
6. Look into the console you can see the message "The server is running at http://localhost:8080". (Address may change according to your setting).
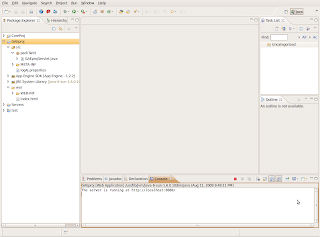
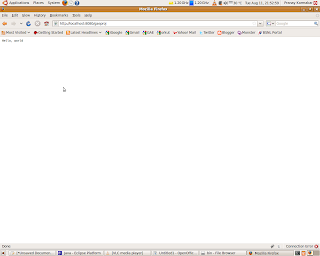
7. Open your browser and type the address mentioned on the console and you can see the below page.
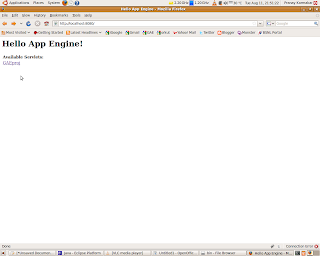
This is the "index.html" file under the /war/WEB-INF/ folder.
8. Now click on the link "GAEproj". You will be navigated to this page which is the servlet "GAEprojServlet.java" under the package "packTwitt".
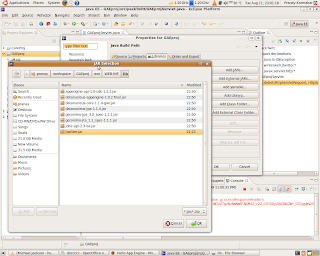
9. You have already downloaded the "jtwitter.jar" from the address http://www.winterwell.com/software/jtwitter.php. We have to add this .jar in our project. For that, select the project "GAEproj", right click on it and click to the "Properties". Select the "Java Build Path" in the left hand side navigation bar. Now click on the "Libraries" tab. Here you can find the button "Add External JARs...". Click on that and select the "jtwitter.jar" from your disk. Now click on "OK". The "jtwitter.jar" file is now included into our project.
10. ok, the project configuration has been done. Now we will move on to the coding section. Open the "index.html" file and modify the code like the below one.

Here, I have introduced a html form with the following properties:
name="ff" (don't ask why), method="POST", action="/gaeproj"
created two text fields one for UserID and another for Password, and finally a Submit button.
11. Open the "GAEprojServlet.java" file and modify the code like the below one.
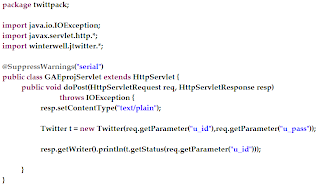
Here, first and most important thing is I have changed the "doGet" method to "doPost" method because I have made the form method = "POST" in my "index.html" file. Now import "winterwell.jtwitter.*".
I've made an object 't' like this and pass the userid and password to the constructor.
Twitter t = new Twitter(req.getParameter("u_id"),req.getParameter("u_pass"));
By the method getStatus(String) I've print my last update on Twitter:
resp.getWriter().println(t.getStatus(req.getParameter("u_id")));
12. Build the project and Run. Enter your Twitter UserID and Password and click on "Submit".
You can see the last update in your Twitter account.
NB1: Make sure before login that your profile in Twitter is not Locked.
NB2: Refer the Twitter.class or jTwitter javaDoc for more exiting functions.
13. Its time for deploying the application in your GAE account. For that click on the "Deploy App Engine Project" in Eclipse (Right most icon in the below screen-shot).
An window will appear. Project Name is already there in our case it is "GAEproj". Now type your gmail address and password by which you have created an application in the GAE site.
Click on the "App Engine project settings...". Give the application ID as your application name in GAE site. As it is first time for you Revision should be 1. Click on "OK" and click on "Deploy". It will deploy your application to your GAE account.
Bang!!! Now you can show your own Twitter tricks to the whole world ....
No comments:
Post a Comment